These are the collections of flutter menus. Floating Action Button menus are very Usable.
1. Flutter Circular Menu Package ( circular_menu )
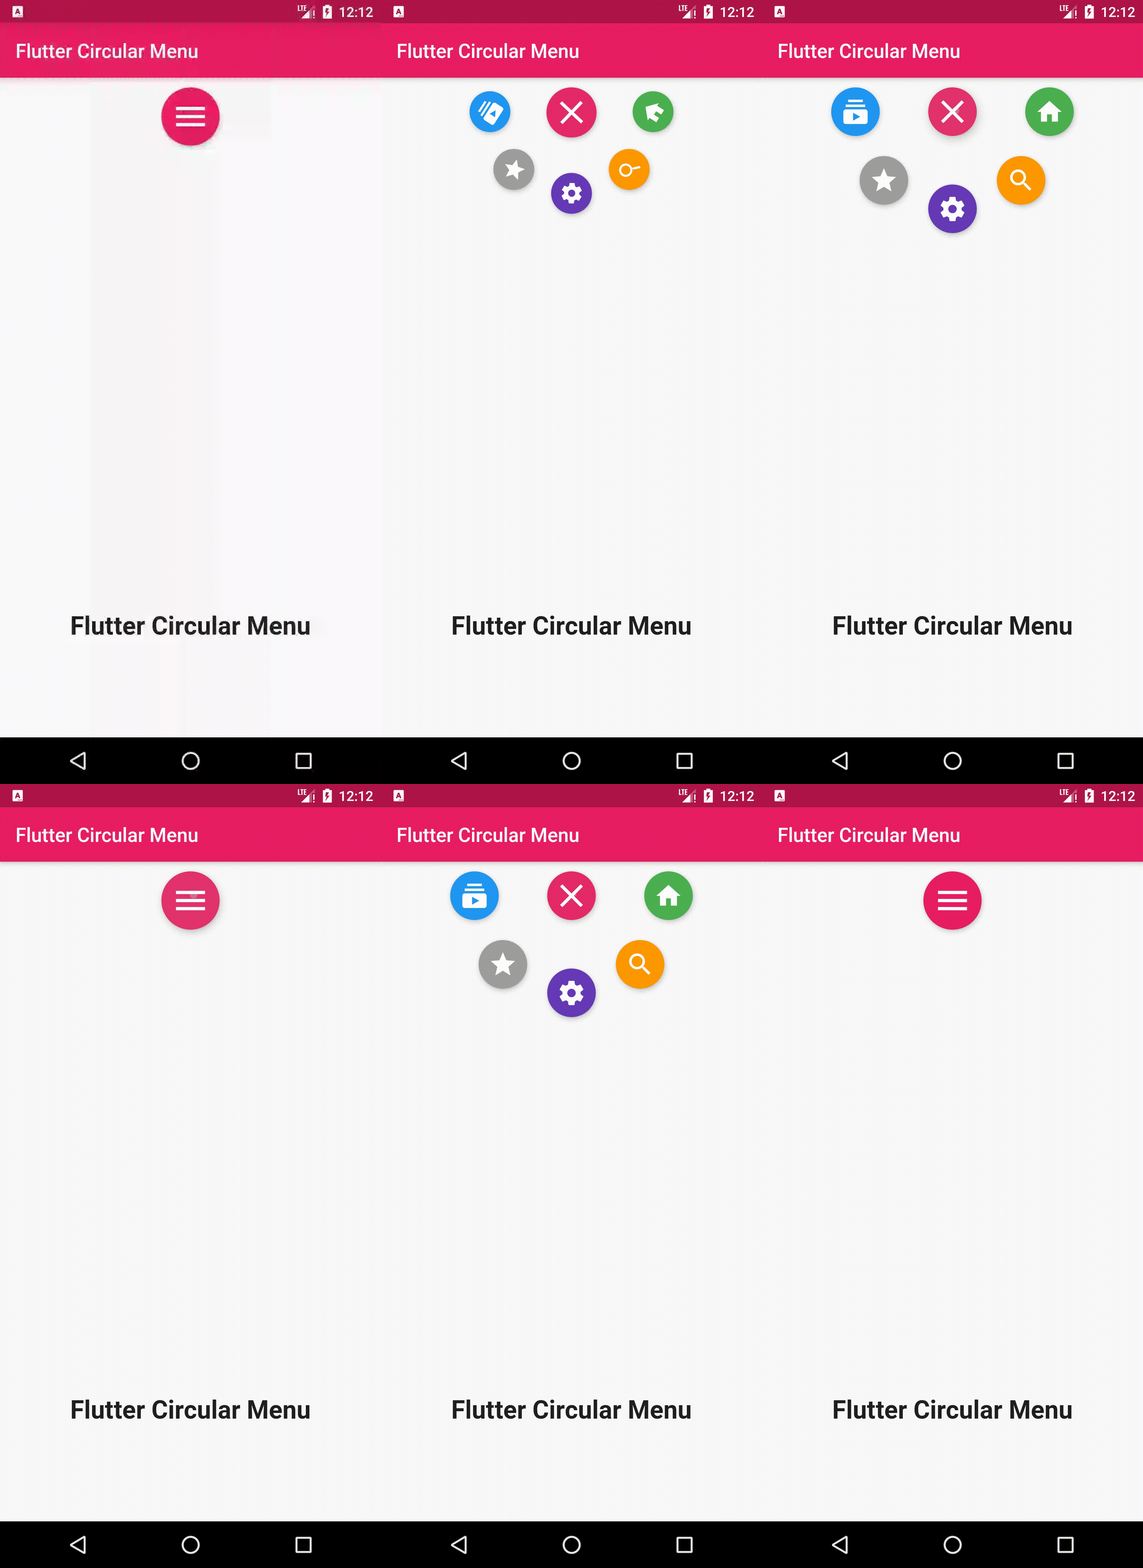
A simple animated circular menu for Flutter, Adjustable radius, colors, alignment, animation curve, and animation duration.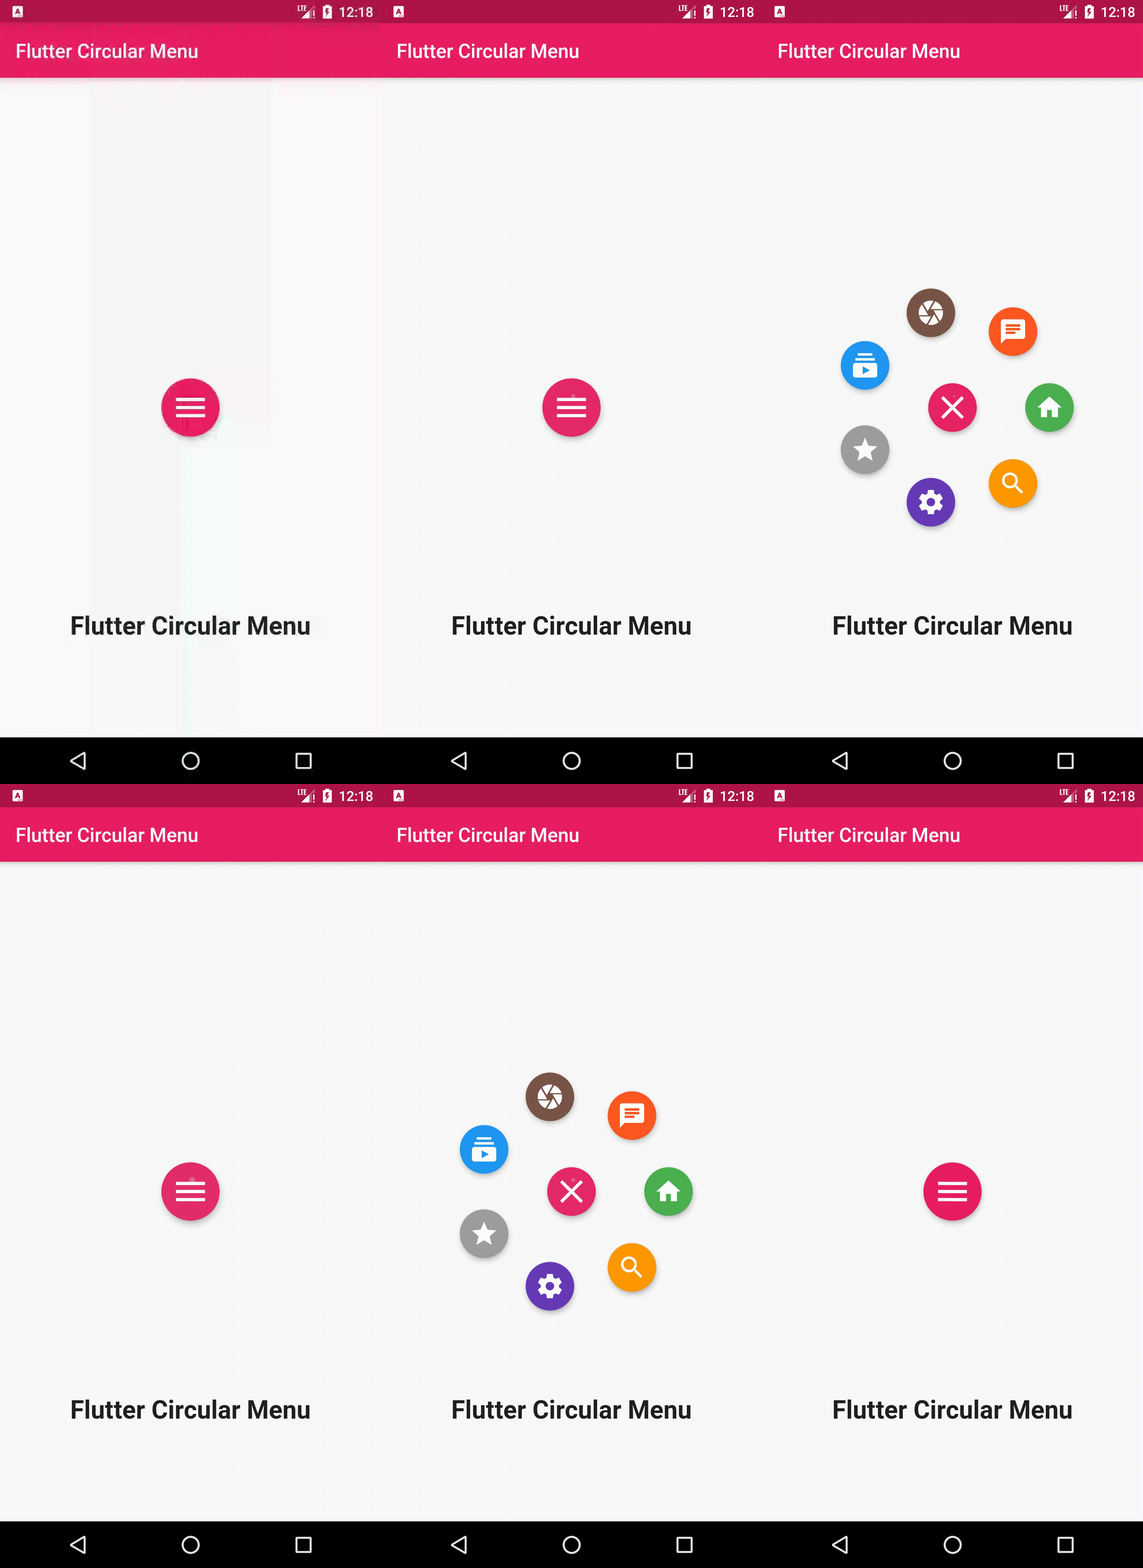
Getting Started
Installation
Add
circular_menu : ^latest_version
to your pubspec.yaml, and run
flutter pub get
in your project's root directory.
Basic Usage
Import it to your project file
import 'package:circular_menu/circular_menu.dart';
And add it in it's most basic form :
final circularMenu = CircularMenu(items: [
    CircularMenuItem(icon: Icons.home, onTap: () {
      // callback
    }),
    CircularMenuItem(icon: Icons.search, onTap: () {
      //callback
    }),
    CircularMenuItem(icon: Icons.settings, onTap: () {
      //callback
    }),
    CircularMenuItem(icon: Icons.star, onTap: () {
      //callback
    }),
    CircularMenuItem(icon: Icons.pages, onTap: () {
      //callback
    }),
  ]);
There are additional optional parameters to initialize the menu with:
  final circularMenu = CircularMenu(
      // menu alignment
      alignment: Alignment.bottomCenter,
      // menu radius
      radius: 100,
      // widget in the background holds actual page content
      backgroundWidget: MyCustomWidget(),
      // global key to control the animation anywhere in the code.
      key: // GlobalKey<CircularMenuState>(),
      // animation duration
      animationDuration: Duration(milliseconds: 500),
      // animation curve in forward
      curve: Curves.bounceOut,
      // animation curve in reverse
      reverseCurve: Curves.fastOutSlowIn,
	// first item angle
      startingAngleInRadian : 0 ,
	// last item angle
      endingAngleInRadian : pi,
      // toggle button callback
      toggleButtonOnPressed: () {
        //callback
      },
      // toggle button appearance properties
      toggleButtonColor: Colors.pink,
      toggleButtonBoxShadow: [
              BoxShadow(
                color: Colors.blue,
                blurRadius: 10,
              ),
            ],
      toggleButtonIconColor: Colors.white,
      toggleButtonMargin: 10.0,
      toggleButtonPadding: 10.0,
      toggleButtonSize: 40.0,
      items: [
        CircularMenuItem(
          // menu item callback
          onTap: () {
            // callback
          },
          // menu item appearance properties
          icon: Icons.home,
          color: Colors.blue,
          elevation: 4.0,
          iconColor: Colors.white,
          iconSize: 30.0,
          margin: 10.0,
          padding: 10.0,
          // when 'animatedIcon' is passed,above 'icon' will be ignored
           animatedIcon:// AnimatedIcon(),
        ),
        CircularMenuItem(
            icon: Icons.search,
            onTap: () {
              //callback
            }),
        CircularMenuItem(
            icon: Icons.settings,
            onTap: () {
              //callback
            }),
        CircularMenuItem(
            icon: Icons.star,
            onTap: () {
              //callback
            }),
        CircularMenuItem(
            icon: Icons.pages,
            onTap: () {
              //callback
            }),
      ]);
control animation anywhere in your code using a key:
  GlobalKey<CircularMenuState> key = GlobalKey<CircularMenuState>();
  @override
  Widget build(BuildContext context) {
    return Scaffold(
      appBar: AppBar(
        backgroundColor: Colors.pink,
        title: Text(
          'Flutter Circular Menu',
          style: TextStyle(
            color: Colors.white,
          ),
        ),
      ),
      body: CircularMenu(
        alignment: Alignment.bottomCenter,
        startingAngleInRadian: 1.25 * pi,
        endingAngleInRadian: 1.75 * pi,
        backgroundWidget: Center(
          child: Row(
            mainAxisAlignment: MainAxisAlignment.spaceEvenly,
            children: <Widget>[
              MaterialButton(
                onPressed: () {
                  key.currentState.forwardAnimation();
                },
                color: Colors.pink,
                shape: RoundedRectangleBorder(
                    borderRadius: BorderRadius.circular(15)),
                padding: const EdgeInsets.all(15),
                child: Text(
                  'forward',
                  style: TextStyle(
                    color: Colors.white,
                    fontSize: 24,
                  ),
                ),
              ),
              MaterialButton(
                onPressed: () {
                  key.currentState.reverseAnimation();
                },
                shape: RoundedRectangleBorder(
                    borderRadius: BorderRadius.circular(15)),
                padding: const EdgeInsets.all(15),
                color: Colors.pink,
                child: Text(
                  'reverse',
                  style: TextStyle(
                    color: Colors.white,
                    fontSize: 24,
                  ),
                ),
              ),
            ],
          ),
        ),
        key: key,
        items: [
          CircularMenuItem(
            icon: Icons.home,
            onTap: () {},
            color: Colors.green,
            iconColor: Colors.white,
          ),
          CircularMenuItem(
            icon: Icons.search,
            onTap: () {},
            color: Colors.orange,
            iconColor: Colors.white,
          ),
          CircularMenuItem(
            icon: Icons.settings,
            onTap: () {},
            color: Colors.deepPurple,
            iconColor: Colors.white,
          ),
        ],
      ),
    );
  }
}
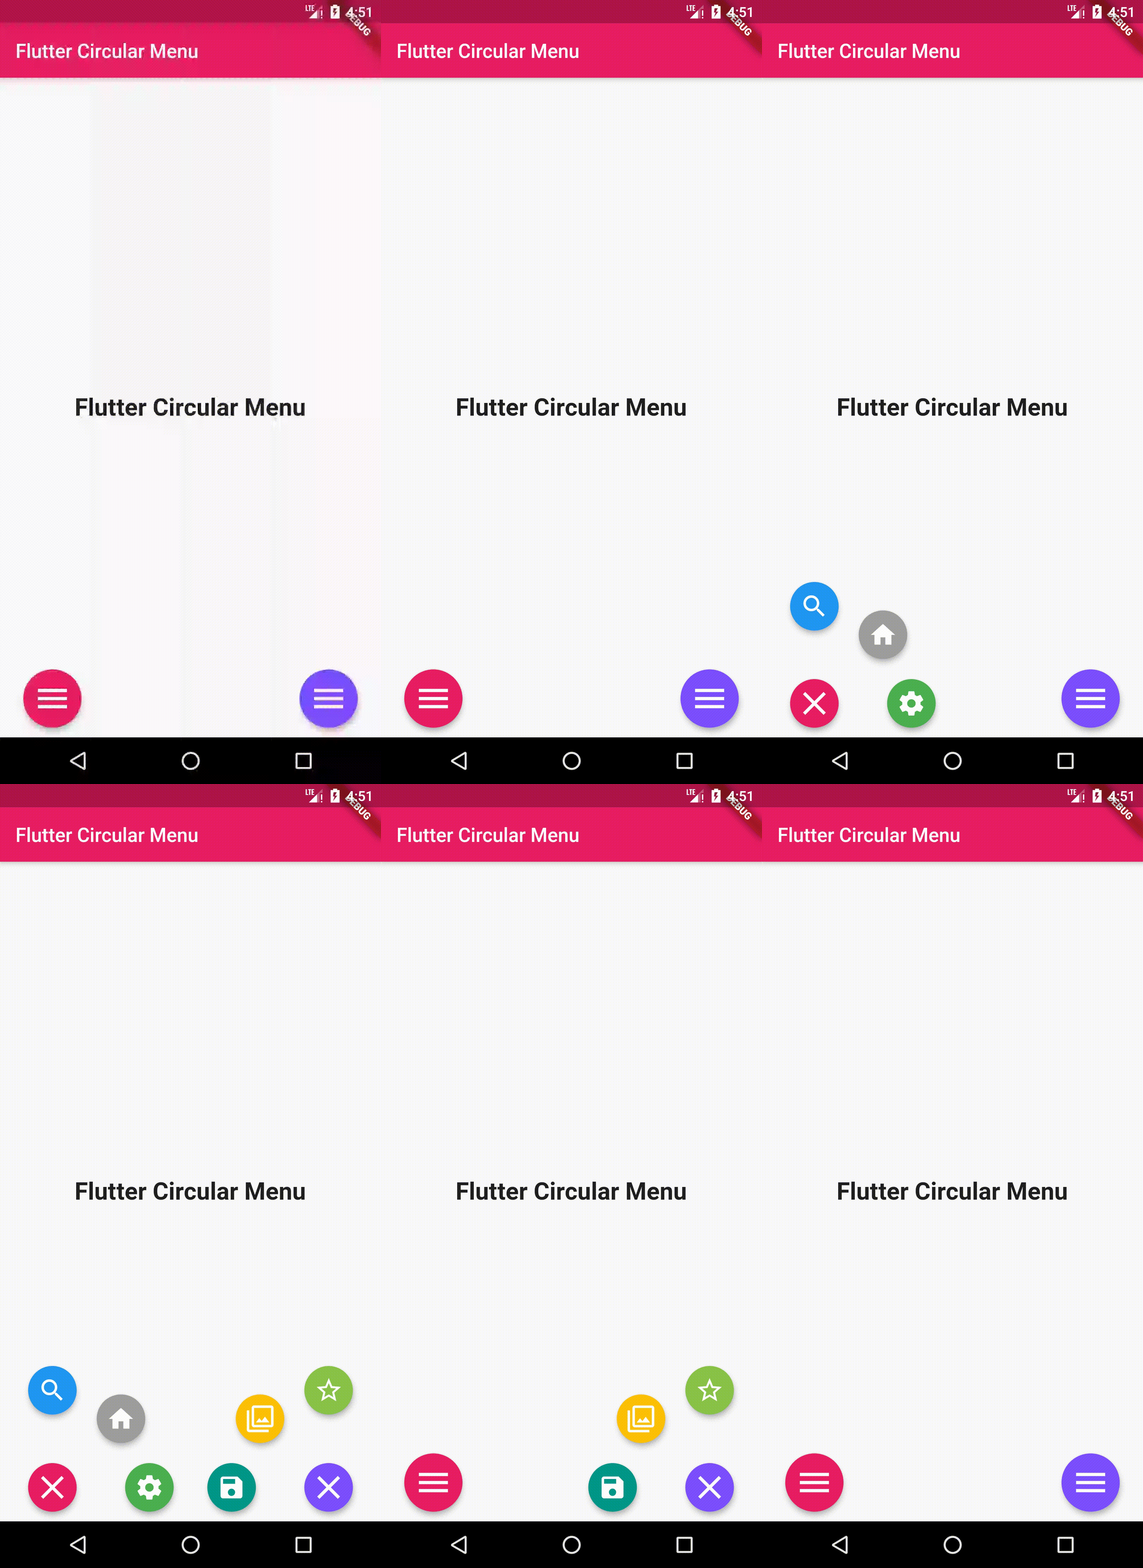
use MultiCircularMenu to show more than one menu in the same widget :
MultiCircularMenu(
          backgroundWidget: Center(
            child: Text(
              "Flutter Circular Menu",
              style: TextStyle(
                fontWeight: FontWeight.bold,
                fontSize: 25,
              ),
            ),
          ),
          menus: [
            CircularMenu(
                toggleButtonColor: Colors.pink,
                alignment: Alignment.bottomLeft,
                items: [
                  CircularMenuItem(
                    onTap: () {
                      print('tapped');
                    },
                    icon: Icons.search,
                    color: Colors.blue,
                  ),
                  CircularMenuItem(
                    onTap: () {
                      print('tapped');
                    },
                    icon: Icons.home,
                    color: Colors.grey,
                  ),
                  CircularMenuItem(
                    onTap: () {
                      print('tapped');
                    },
                    icon: Icons.settings,
                    color: Colors.green,
                  ),
                ]),
            CircularMenu(
                toggleButtonColor: Colors.deepPurpleAccent,
                alignment: Alignment.bottomRight,
                items: [
                  CircularMenuItem(
                    onTap: () {
                      print('tapped');
                    },
                    icon: Icons.save,
                    color: Colors.teal,
                  ),
                  CircularMenuItem(
                    onTap: () {
                      print('tapped');
                    },
                    icon: Icons.filter,
                    color: Colors.amber,
                  ),
                  CircularMenuItem(
                    onTap: () {
                      print('tapped');
                    },
                    icon: Icons.star_border,
                    color: Colors.lightGreen,
                  ),
                ]),
          ])
2. Focused Menu ( focused_menu )
This is an easy to implement package for adding Focused Long Press Menu to Flutter Applications
Current Features
- Add Focused Menu to Any Widget you Want
- Customizations to change The Focused Menu and Animations according to your Application Needs.
Demo

Usage
To Use, simply Wrap the Widget you want to add Focused Menu to, with FocusedMenuHolder:
              Expanded(
                child: GridView(
                  physics: BouncingScrollPhysics(),
                  gridDelegate: SliverGridDelegateWithFixedCrossAxisCount(crossAxisCount: 2),
                  children: [1, 2, 3, 4, 5, 6, 7, 8, 9, 10, 11, 12]

                       // Wrap each item (Card) with Focused Menu Holder
                      .map((e) => FocusedMenuHolder(
                        menuWidth: MediaQuery.of(context).size.width*0.50,
                        blurSize: 5.0,
                        menuItemExtent: 45,
                        menuBoxDecoration: BoxDecoration(color: Colors.grey,borderRadius: BorderRadius.all(Radius.circular(15.0))),
                        duration: Duration(milliseconds: 100),
                        animateMenuItems: true,
                        blurBackgroundColor: Colors.black54,
                        menuOffset: 10.0, // Offset value to show menuItem from the selected item
                        bottomOffsetHeight: 80.0, // Offset height to consider, for showing the menu item ( for example bottom navigation bar), so that the popup menu will be shown on top of selected item.
                        menuItems: <FocusedMenuItem>[
                          // Add Each FocusedMenuItem  for Menu Options
                          FocusedMenuItem(title: Text("Open"),trailingIcon: Icon(Icons.open_in_new) ,onPressed: (){
                            Navigator.push(context, MaterialPageRoute(builder: (context)=>ScreenTwo()));
                          }),
                          FocusedMenuItem(title: Text("Share"),trailingIcon: Icon(Icons.share) ,onPressed: (){}),
                          FocusedMenuItem(title: Text("Favorite"),trailingIcon: Icon(Icons.favorite_border) ,onPressed: (){}),
                          FocusedMenuItem(title: Text("Delete",style: TextStyle(color: Colors.redAccent),),trailingIcon: Icon(Icons.delete,color: Colors.redAccent,) ,onPressed: (){}),
                        ],
                        onPressed: (){},
                        child: Card(
                              child: Column(
                                children: <Widget>[
                                  Image.asset("assets/images/image_$e.jpg"),
                                ],
                              ),
                            ),
                      ))
                      .toList(),
                ),
              ),
3. hawk_fab_menu ( hawk_fab_menu )
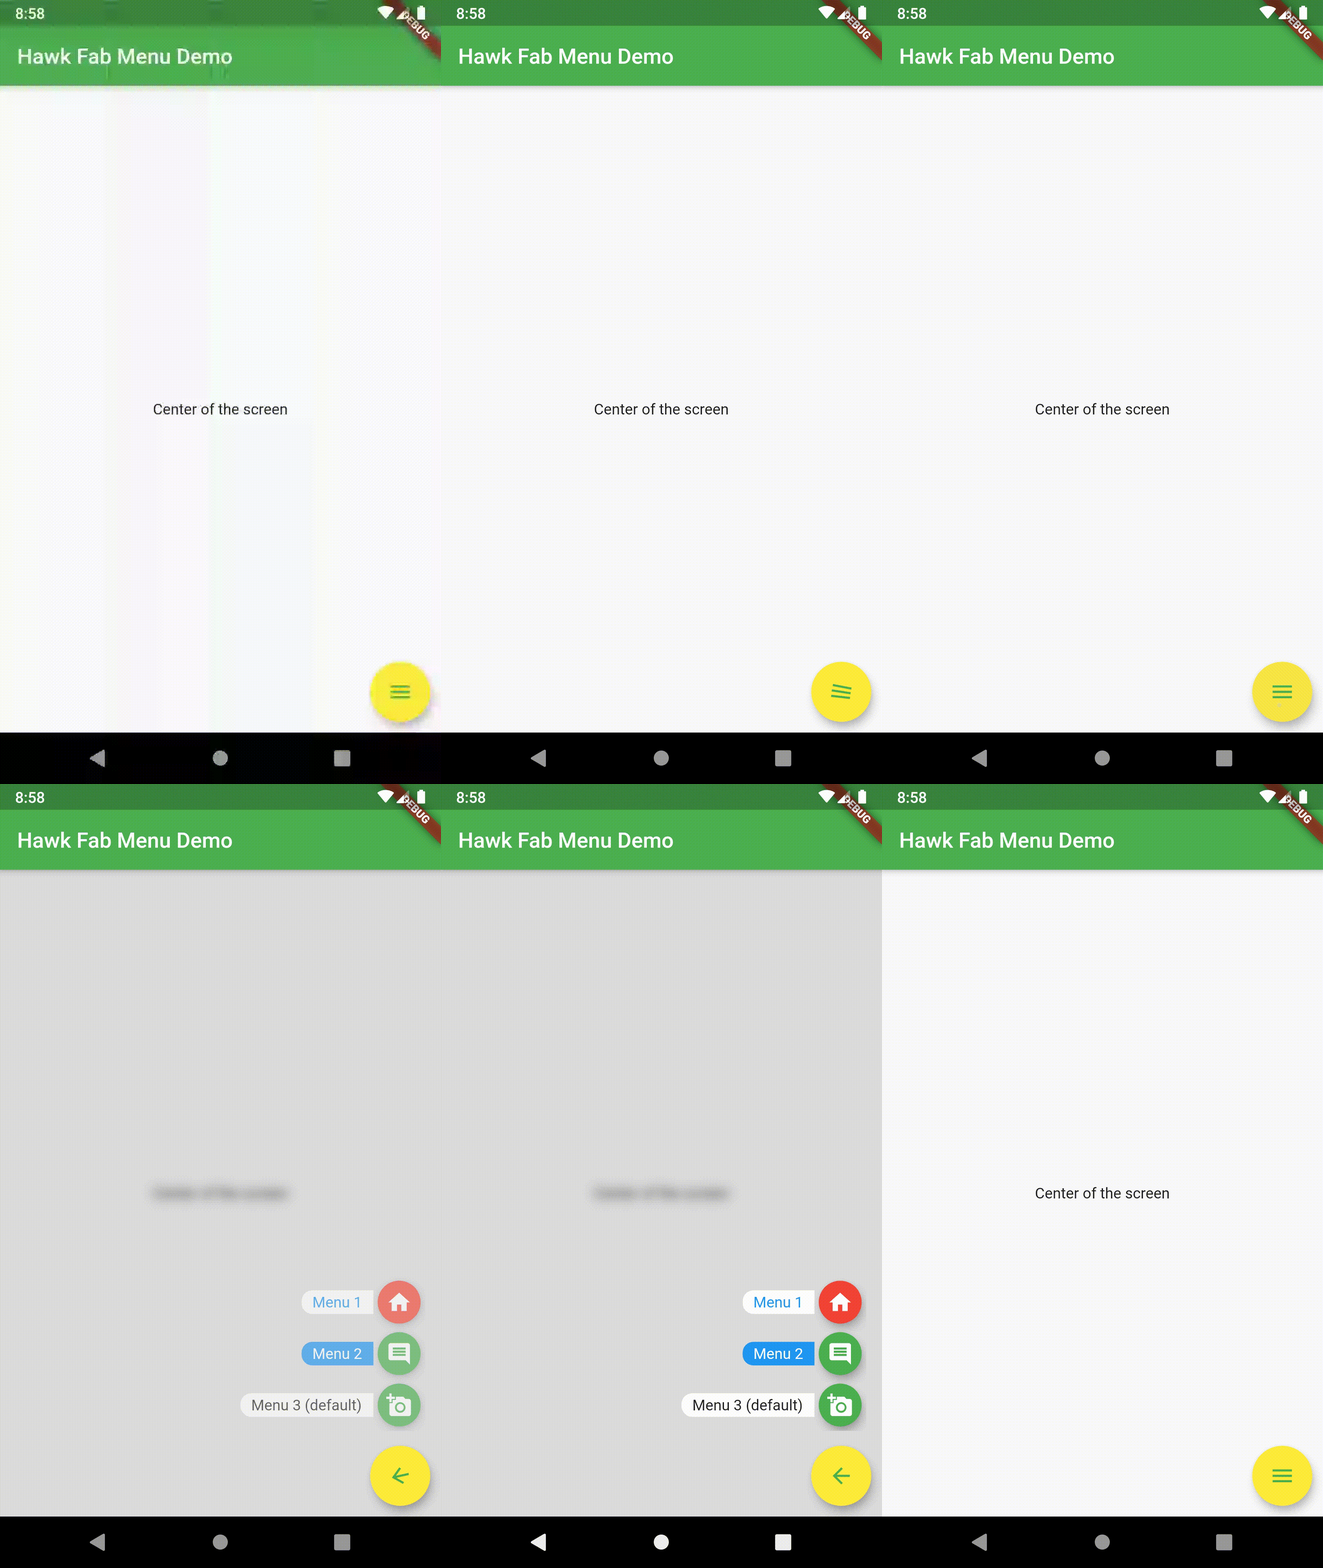
Example:
Widget build(BuildContext context) {
  return Scaffold(
    appBar: AppBar(
      title: Text(this.title),
    ),
    body: Builder(
      // builder is used only for the snackbar, if you don't want the snackbar you can remove
      // Builder from the tree
      builder: (BuildContext context) => HawkFabMenu(
        icon: AnimatedIcons.menu_arrow,
        fabColor: Colors.yellow,
        iconColor: Colors.green,
        items: [
          HawkFabMenuItem(
            label: 'Menu 1',
            ontap: () {
              Scaffold.of(context)..hideCurrentSnackBar();
              Scaffold.of(context).showSnackBar(
                SnackBar(content: Text('Menu 1 selected')),
              );
            },
            icon: Icon(Icons.home),
            color: Colors.red,
            labelColor: Colors.blue,
          ),
          HawkFabMenuItem(
            label: 'Menu 2',
            ontap: () {
              Scaffold.of(context)..hideCurrentSnackBar();
              Scaffold.of(context).showSnackBar(
                SnackBar(content: Text('Menu 2 selected')),
              );
            },
            icon: Icon(Icons.comment),
            labelColor: Colors.white,
            labelBackgroundColor: Colors.blue,
          ),
          HawkFabMenuItem(
            label: 'Menu 3 (default)',
            ontap: () {
              Scaffold.of(context)..hideCurrentSnackBar();
              Scaffold.of(context).showSnackBar(
                SnackBar(content: Text('Menu 3 selected')),
              );
            },
            icon: Icon(Icons.add_a_photo),
          ),
        ],
        body: Center(
          child: Text('Center of the screen'),
        ),
      ),
    ),
  );
}
4. FAB Circular Menu ( fab_circular_menu )
A Flutter package to create a nice circular menu using a Floating Action Button.
Inspired by Mayur Kshirsagar's great FAB Microinteraction design.

Installation
Just add fab_circular_menu to your pubspec.yml file
dependencies:
  fab_circular_menu: ^1.0.0
Example
class MyApp extends StatelessWidget {
  @override
  Widget build(BuildContext context) {
    return MaterialApp(
      home: Scaffold(
        body: Placeholder(),
        floatingActionButton: FabCircularMenu(
          children: <Widget>[
            IconButton(icon: Icon(Icons.home), onPressed: () {
              print('Home');
            }),
            IconButton(icon: Icon(Icons.favorite), onPressed: () {
              print('Favorite');
            })
          ]
        )
      )
    );
  }
}
You can check for a more complete example in the example directory.
Customize
You can customize the widget appareance using the following properties:
| Property | Description | Default |
|---|---|---|
| alignment | Sets the widget alignment | Alignment.bottomRight |
| ringColor | Sets the ring color | accentColor |
| ringDiameter | Sets de ring diameter | screenWidth * 1.25 (portrait)screenHeight * 1.25 (landscape) |
| ringWidth | Sets the ring width | ringDiameter * 0.3 |
| fabSize | Sets the FAB size | 64.0 |
| fabElevation | Sets the elevation for the FAB | 8.0 |
| fabColor | Sets the FAB color | primaryColor |
| fabOpenColor | Sets the FAB color while the menu is open. This property takes precedence over fabColor | - |
| fabCloseColor | Sets the FAB color while the menu is closed. This property takes precedence over fabColor | - |
| fabOpenIcon | Sets the FAB icon while the menu is open | Icon(Icons.menu) |
| fabCloseIcon | Sets the FAB icon while the menu is closed | Icon(Icons.close) |
| fabMargin | Sets the widget margin | EdgeInsets.all(16.0) |
| animationDuration | Changes the animation duration | Duration(milliseconds: 800) |
| animationCurve | Allows you to modify de animation curve | Curves.easeInOutCirc |
| onDisplayChange | This callback is called every time the menu is opened or closed, passing the current state as a parameter. | - |
Handling the menu programmatically
It is possible to handle the menu programatically by using a key. Just create a key and set it in the key property of the FabCircularMenu, then use the key to get the current state and open, close or check the status of the menu.
class MyApp extends StatelessWidget {
  final GlobalKey<FabCircularMenuState> fabKey = GlobalKey();

  @override
  Widget build(BuildContext context) {
    return MaterialApp(
      home: Scaffold(
        body: RaisedButton(
          onPressed: () {
            if (fabKey.currentState.isOpen) {
              fabKey.currentState.close();
            } else {
              fabKey.currentState.open();
            }
          },
          child: Text('Toggle menu')
        ),
        floatingActionButton: FabCircularMenu(
          key: fabKey,
          children: <Widget>[
            // ...
          ]
        )
      )
    );
  }
}
5. Flutter Boom Menu ( flutter_boom_menu )
Usage
The BoomMenu widget is built to be placed in the Scaffold.floatingActionButton argument, replacing the FloatingActionButton widget. It's not possible to set its position with the Scaffold.floatingActionButtonLocation argument, but it's possible to set right/bottom margin with the marginRight and marginBottom arguments (default to 16) to place the button anywhere in the screen. Using the Scaffold.bottomNavigationBar the floating button will be always placed above the bar, so the BottomAppBar.hasNotch should be always false.
Title
Every child button can have a Icon,Title, SubTitle which can be customized providing by yourself. If the Title parameter is not provided the title will be not rendered.
The package will handle the animation by itself.

Example Usage ( complete with all params ):
Widget build(BuildContext context) {
    return Scaffold(
        floatingActionButton: BoomMenu(
      animatedIcon: AnimatedIcons.menu_close,
      animatedIconTheme: IconThemeData(size: 22.0),
      //child: Icon(Icons.add),
      onOpen: () => print('OPENING DIAL'),
      onClose: () => print('DIAL CLOSED'),
      scrollVisible: scrollVisible,
      overlayColor: Colors.black,
      overlayOpacity: 0.7,
      children: [
        MenuItem(
          child: Icon(Icons.accessibility, color: Colors.black),
          title: "Profiles",
          titleColor: Colors.white,
          subtitle: "You Can View the Noel Profile",
          subTitleColor: Colors.white,
          backgroundColor: Colors.deepOrange,
          onTap: () => print('FIRST CHILD'),
        ),
        MenuItem(
          child: Icon(Icons.brush, color: Colors.black),
          title: "Profiles",
          titleColor: Colors.white,
          subtitle: "You Can View the Noel Profile",
          subTitleColor: Colors.white,
          backgroundColor: Colors.green,
          onTap: () => print('SECOND CHILD'),
        ),
        MenuItem(
          child: Icon(Icons.keyboard_voice, color: Colors.black),
          title: "Profile",
          titleColor: Colors.white,
          subtitle: "You Can View the Noel Profile",
          subTitleColor: Colors.white,
          backgroundColor: Colors.blue,
          onTap: () => print('THIRD CHILD'),
        ),
        MenuItem(
          child: Icon(Icons.ac_unit, color: Colors.black),
          title: "Profiles",
          titleColor: Colors.white,
          subtitle: "You Can View the Noel Profile",
          subTitleColor: Colors.white,
          backgroundColor: Colors.blue,
          onTap: () => print('FOURTH CHILD'),
        )
      ],
    ),
    );
}
6. selection_menu
A highly customizable selection/select menu to choose an item from a list, with optional search feature.
Getting Started
The package provides two libraries:
- selection_menu: Provides Widgets
- components_configurations: Provides styles(ComponentsConfigurations) for Widgets
The image shows the same SelectionMenu Widget with three different ComponentsConfigurations.

Basic Usage
import 'package:selection_menu/selection_menu.dart';

SelectionMenu<String>(
    itemsList: <String>['A','B','C'],
    onItemSelected: (String selectedItem)
    {
    print(selectedItem);
    },
    itemBuilder: (BuildContext context, String item, OnItemTapped onItemTapped)
    {
       return Material(
         InkWell(
           onTap: onItemTapped,
           child: Text(item),
         ),
       );
    },
    // other Properties...
);
Using A ComponentsConfiguration
import 'package:selection_menu/selection_menu.dart';

// IMPORT this package to get access to configuration classes.
import 'package:selection_menu/components_configurations.dart';

SelectionMenu<String>(
  itemsList: <String>['A','B','C'],
  onItemSelected: (String selectedItem)
  {
    print(selectedItem);
  },
  itemBuilder: (BuildContext context, String item, OnItemTapped onItemTapped)
  {
    return Material(
      InkWell(
        onTap: onItemTapped,
        child: Text(item),
      ),
    );
  },
  componentsConfigurations: DropdownComponentsConfigurations<String>(),
);
Customization
The menu is divided into parts called Components which allows to change one part while the others remain intact.
A ComponentsConfiguration is simply a container for all Components and configurations.

Reading the examples is recommended because there are a lot of things to cover and an intro page shouldn't be that long.
7. Full-Screen Menu for Flutter ( full_screen_menu )
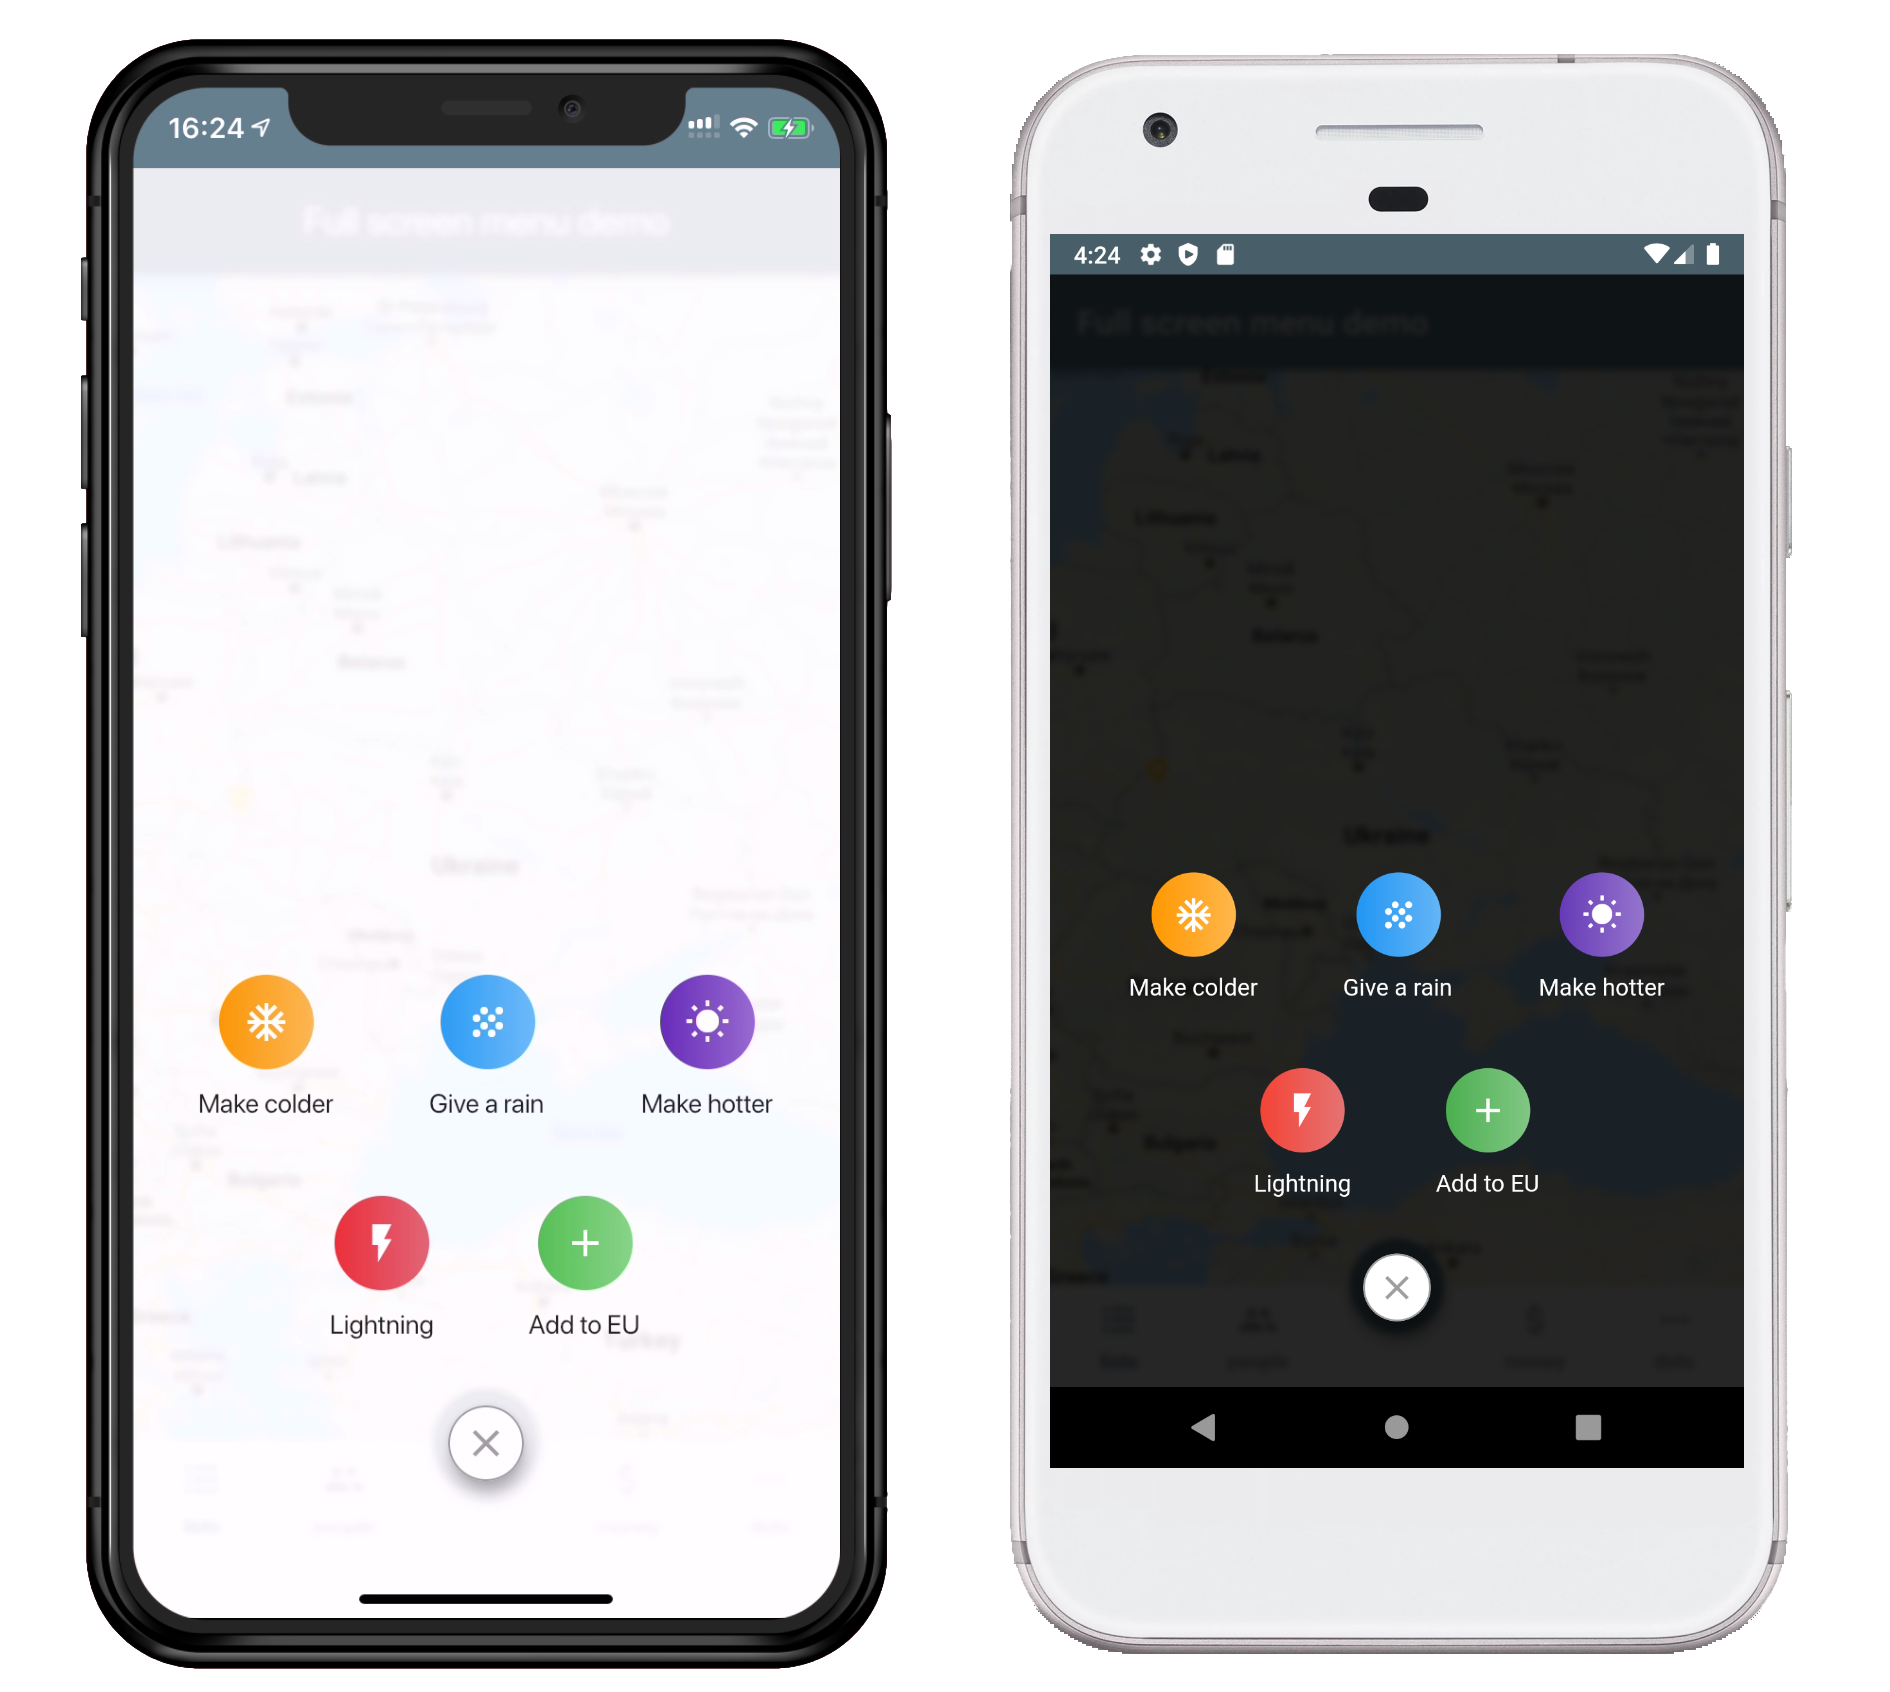
Installing:
In your pubspec.yaml
dependencies:
  full_screen_menu: ^0.1.2
import 'package:full_screen_menu/full_screen_menu.dart';
Basic Usage:
    FullScreenMenu.show(
      context,
      items: [
        Image.asset('assets/image.png'),
        FSMenuItem(
          icon: Icon(Icons.ac_unit, color: Colors.white),
          text: Text('Make colder'),
          onTap: () => print('Cool package check');
        ),
        FSMenuItem(
          icon: Icon(Icons.wb_sunny, color: Colors.white),
          text: Text('Make hotter'),
        ),
      ],
    );
8. Swipe Up Menu ( swipe_up_menu )
A Flutter package to create a Swipe Menu who appears when sliding on the right side of the screen.
Basic Usage
SwipeUpMenu(
    body: <Widget>[
        Scaffold(appBar: AppBar(title: Text("Page 1"), centerTitle:  true), backgroundColor: Colors.blue),
        Scaffold(appBar: AppBar(title: Text("Page 2"), centerTitle:  true), backgroundColor: Colors.yellow),
    ],
    items: <SwipeUpMenuItem>[
        SwipeUpMenuItem(title: Text("Menu 1"), icon: Icon(Icons.home, color: Colors.white), backgroundColor: Colors.blue),
        SwipeUpMenuItem(title: Text("Menu 2"), icon: Icon(Icons.mail, color: Colors.white), backgroundColor: Colors.yellow),
    ],
    startIndex: 0,
    onChange: (index){},
    animationDuration: Duration(milliseconds: 500)
)
Options
| Property | Type | Description | Default |
|---|---|---|---|
required body | List | The list of body of your App | - |
required items | List | The list of items to show in menu | - |
| startIndex | Integer | The start index of menus | 0 |
| onChange | Function | The function who return a index when it change | null |
| animationDuration | Duration | The duration of animation | Duration(milliseconds:500) |
9. Flutter Float Box( floatingpanel )
Overview
Float box is a true floating panel for your app, which can be docked to either edges of the screen (horizontally).
Code - Basic:
This is what you needs to get the widget working. Import Widget -> Add 'FloatBoxPanel' at the bottom of your stack widget. Add icons inside the "buttons" list.
import 'package:widgets/float_box.dart'; // Import Float Box Widget

Stack(
    children: [
        ...

        // Add Float Box Panel at the bottom of the 'stack' widget.
        FloatBoxPanel(
            buttons: [
                // Add Icons to the buttons list.
                Icons.message,
                Icons.photo_camera,
                Icons.video_library
            ]
        );
    ]
);

Code - All Properties:
These are all the properties you can customize of the floating panel.
    import 'package:widgets/float_box.dart'; // Import Float Box Widget

    Stack(
        children: [
            ...

            // Add Float Box Panel at the bottom of the 'stack' widget.
            FloatBoxPanel(
                positionTop: 0.0, // Initial Top Position
                positionLeft: 0.0, // Initial Left Position
                backgroundColor: Color(0xFFEDEDED), // Color of the panel
                contentColor: Colors.black, // Color of the icons
                panelShape: PanelShape.rectangle, // 'PanelShape.rectangle' or 'PanelShape.rounded', border radius property doesn't work in the rounded shape
                borderRadius: BorderRadius.circular(8.0), // Border radius of the panel
                dockType: DockType.inside, // 'DockType.inside' or 'DockType.outside', weather to dock the panel outside or inside the edge of the screen
                dockOffset: 5.0, // Offset the dock from the edge depending on the 'dockType' property
                panelAnimDuration: 300, // Duration for panel open and close animation
                panelAnimCurve: Curves.easeOut, // Curve for panel open and close animation
                dockAnimDuration: 300, // Auto dock to the edge of screen - animation duration
                dockAnimCurve: Curves.easeOut, // Auto dock animation curve
                panelOpenOffset: 20.0, // Offset from the edge of screen when panel is open
                panelIcon: Icons.menu, // Panel open/close icon
                size: 70.0, // Size of single button in the panel
                iconSize: 24.0, // Size of icons
                borderWidth: 1.0, // Width of panel border
                borderColor: Colors.black, // Color of panel border
                onPressed: (index) {
                    print("Clicked on item: $index");
                }
                buttons: [
                    // Add Icons to the buttons list.
                    Icons.message,
                    Icons.photo_camera,
                    Icons.video_library
                ]
            );
        ]
    );


0 Comments
Welcome! Please Comment Without Any Hesitation.
Thank You