
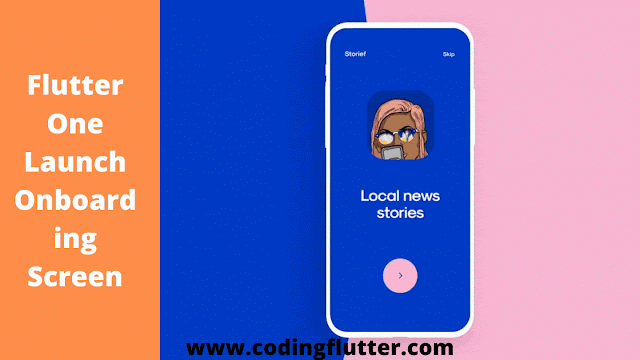
Using the onboarding screen for the first time in the flutter app is easy you should use the shared preference plugin to achieve the onboarding screen only for the first time launch app. This is the main code which you will use to store the value of the app.
Go to pub.dev and install the shared preferences package in your app. Using the Shared Preferences package we can store the value of the launches app and easily create for the only first-time Introduction screens easily.
Go to pub.dev and install the shared preferences package in your app. Using the Shared Preferences package we can store the value of the launches app and easily create for the only first-time Introduction screens easily.
import import 'package:flutter/material.dart';
import 'freelancinglayout/leftmenu_dashboard_layout.dart';
import 'freelancing_step_model.dart';
import 'package:shared_preferences/shared_preferences.dart';

int initScreen;

Future main() async {
  WidgetsFlutterBinding.ensureInitialized();
  SharedPreferences prefs = await SharedPreferences.getInstance();
  initScreen = prefs.getInt("initScreen");
  await prefs.setInt("initScreen", 1);
  print('initScreen $initScreen');
  runApp(MyAppLancing());
}

class MyAppLancing extends StatelessWidget {
  // This widget is the root of your application.
  @override
  Widget build(BuildContext context) {
    return MaterialApp(
      title: 'All Freelancing Websites App',
      theme: ThemeData(
        primarySwatch: Colors.blue,
      ),
      initialRoute: initScreen == 0 || initScreen == null
          ? "first"
          : "MenuDashboardLayout",
      routes: {
        'MenuDashboardLayout': (context) => MenuDashboardLayout(),
        "first": (context) => FreelancingOnboarding(),
      },
    );
  }
}
;
import
import 'package:flutter/material.dart';
import 'freelancinglayout/leftmenu_dashboard_layout.dart';
import 'freelancing_step_model.dart';
import 'package:shared_preferences/shared_preferences.dart';
int initScreen;
Future main() async {
WidgetsFlutterBinding.ensureInitialized();
SharedPreferences prefs = await SharedPreferences.getInstance();
initScreen = prefs.getInt("initScreen");
await prefs.setInt("initScreen", 1);
print('initScreen $initScreen');
runApp(MyAppLancing());
}
class MyAppLancing extends StatelessWidget {
// This widget is the root of your application.
@override
Widget build(BuildContext context) {
return MaterialApp(
title: 'All Freelancing Websites App',
theme: ThemeData(
primarySwatch: Colors.blue,
),
initialRoute: initScreen == 0 || initScreen == null
? "first"
: "MenuDashboardLayout",
routes: {
'MenuDashboardLayout': (context) => MenuDashboardLayout(),
"first": (context) => FreelancingOnboarding(),
},
);
}
}
;Now you can connect the onboarding screen pages designs with the above code. Here is the Design Coding For the Onboarding Screens Pages.
import
class FreelancingOnboarding extends StatefulWidget {
@override
_FreelancingOnboardingState createState() => _FreelancingOnboardingState();
}
class _FreelancingOnboardingState extends State {
List list = StepModel.list;
var _controller = PageController();
var initialPage = 0;
@override
Widget build(BuildContext context) {
_controller.addListener(() {
setState(() {
initialPage = _controller.page.round();
});
});
return Scaffold(
body: Column(
children: [
_appBar(),
_body(_controller),
_indicator(),
],
),
);
}
_appBar() {
return Container(
margin: EdgeInsets.only(top: 25),
padding: EdgeInsets.all(12),
child: Row(
mainAxisAlignment: MainAxisAlignment.spaceBetween,
children: [
GestureDetector(
onTap: () {
if (initialPage > 0)
_controller.animateToPage(initialPage - 1,
duration: Duration(microseconds: 500),
curve: Curves.easeIn);
},
child: Container(
width: 50,
height: 50,
decoration: BoxDecoration(
color: Colors.grey.withAlpha(50),
borderRadius: BorderRadius.all(
Radius.circular(15),
),
),
child: Icon(Icons.arrow_back_ios),
),
),
FlatButton(
onPressed: () {
Navigator.of(context).pushReplacementNamed('MenuDashboardLayout');
},
child: Text(
"Skip",
style: TextStyle(
fontWeight: FontWeight.bold,
fontSize: 16,
color: Colors.black,
),
),
),
],
),
);
}
_body(PageController controller) {
return Expanded(
child: PageView.builder(
controller: controller,
itemCount: list.length,
itemBuilder: (context, index) {
return Column(
children: [
index == 1
? _displayText(list[index].text)
: _displayImage(list[index].id),
SizedBox(
height: 25,
),
index == 1
? _displayImage(list[index].id)
: _displayText(list[index].text),
],
);
},
),
);
}
_indicator() {
return Container(
width: 90,
height: 90,
margin: EdgeInsets.symmetric(vertical: 12),
child: Stack(
children: [
Align(
alignment: Alignment.center,
child: Container(
width: 90,
height: 90,
child: CircularProgressIndicator(
valueColor: AlwaysStoppedAnimation(Colors.purple),
value: (initialPage + 1) / (list.length + 1),
),
),
),
Align(
alignment: Alignment.center,
child: GestureDetector(
onTap: () {
if (initialPage < list.length)
_controller.animateToPage(initialPage + 1,
duration: Duration(microseconds: 500),
curve: Curves.easeIn);
},
child: Container(
width: 65,
height: 65,
decoration: BoxDecoration(
color: Colors.purple,
borderRadius: BorderRadius.all(
Radius.circular(100),
),
),
child: Icon(
Icons.arrow_forward_ios,
color: Colors.white,
),
),
),
)
],
),
);
}
_displayText(String text) {
return Text(
text,
style: TextStyle(
fontWeight: FontWeight.bold,
fontSize: 20,
),
textAlign: TextAlign.center,
);
}
_displayImage(int path) {
return Image.asset(
"assets/images/$path.png",
height: MediaQuery.of(context).size.height * .5,
);
}
} ;This is the full source code of the app with onboarding screens.
Following is the StepModel Class.
import  class StepModel {
  final int id;
  final String text;

  StepModel({this.id, this.text});

  static List list = [
    StepModel(
      id: 1,
      text: "Browse the menu\nand order directly from\nthe application",
    ),
    StepModel(
      id: 2,
      text:
          "Your order will be\nimmediately collected and\nsent by our courier",
    ),
    StepModel(
      id: 3,
      text: "Pick update delivery\nat your door and enjoy\ngroceries",
    ),
  ];
}
;

0 Comments
Welcome! Please Comment Without Any Hesitation.
Thank You